How to Make Small Wall Art Look Expensive: Designer Secrets Revealed
Wall art sized for compact spaces has become more significant as small-space living grows in popularity. Hanging art in tight areas presents challenges, but several creative approaches can make your collection appear luxurious and purposeful.
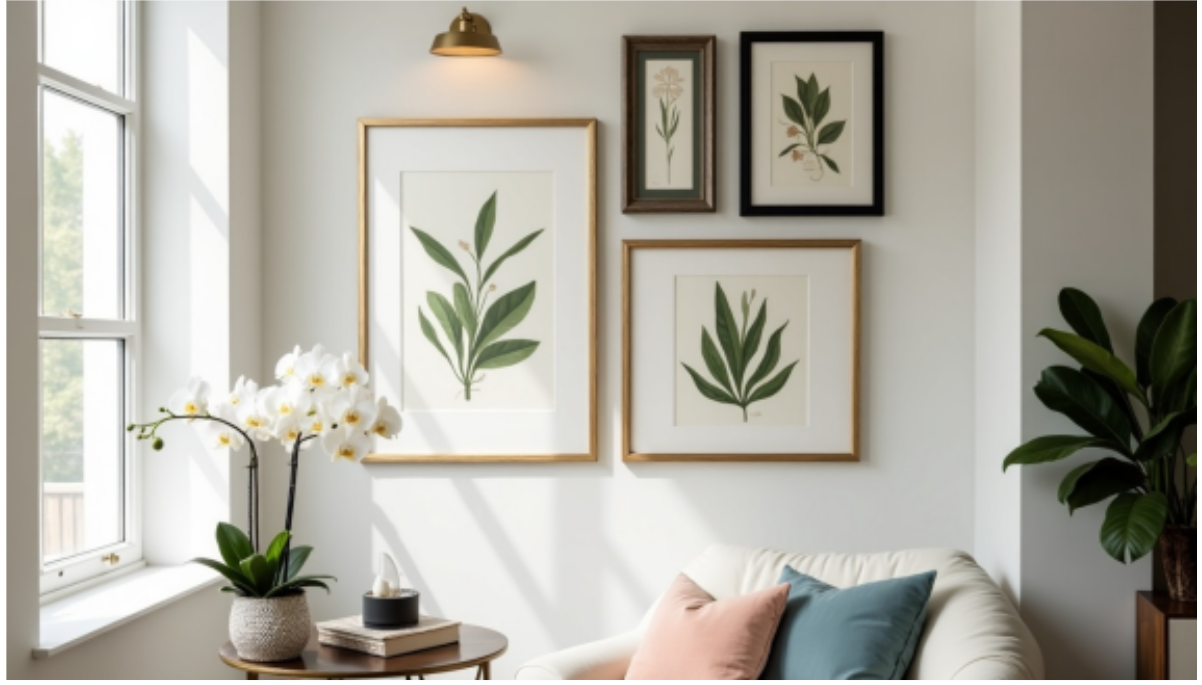
Strategic placement of wall art can make a room feel more spacious. Designers recommend mounting artwork at 150cm from the floor - average eye level. The pieces should occupy about two-thirds of the wall space above furniture. A high-end gallery atmosphere emerges in compact areas when proper framing techniques combine with careful spacing of 5-10cm between pieces.
Professional framing secrets and strategic lighting can revolutionize simple artwork into sophisticated focal points. Expert installation methods help showcase your small wall art display effectively. These techniques create an impressive visual impact that maximizes your space.
Professional Framing Techniques for Small Wall Art
Professional framing can change even the smallest artwork into an eye-catching centerpiece. We found that the right framing techniques make an important difference in how people see and preserve small wall art.
Custom matting secrets
The right mat can really improve small wall art's presence. Small openings with larger mats create better visual appeal[1]. Professional framers use acid-free materials to stop yellowing and degradation[2]. Off-white or black mats work best, as these neutral tones complement most artwork without overpowering it[3].
Museum-quality mounting methods
Quality is our priority when it comes to mounting techniques. Professional mounting needs acid-free backing and exact positioning to avoid damage. Museum quality mounting has:
UV-protective glass that blocks 99% of harmful rays[2]
Acid-free mounting materials to stop deterioration
Reversible mounting techniques to help future conservation[4]
Selecting premium frame materials
Premium frame selection makes a big difference for small wall art. These high-quality options work best:
Frame Material
Best Used For
Solid hardwood
Traditional artwork[5]
Museum acrylic
Gallery displays[5]
Conservation glass
Valuable pieces[2]
Our frames use FSC-certified materials[6]. Thin profiles often work better in compact areas without reducing protection when we pick frames for small spaces.
Quality framing needs attention to detail at every step. Conservation barrier board with calcium carbonate between the artwork and backing board protects your pieces best[7]. Our mounting techniques follow Fine Art Trade Guild standards, which rank protection from Level 1 to 4. Level 1 gives ultimate protection using the best conservation materials[7].
Strategic Lighting to Enhance Small Artwork
The right lighting makes small wall art stand out and look extraordinary. We found that good lighting can transform modest pieces into sophisticated and valuable displays.
Art-specific lighting fixtures
Adjustable lighting fixtures give precise control over direction and intensity[8]. Track lighting and adjustable recessed lighting are the most flexible options to
highlight specific artworks. LED lights have become our top choice because they produce minimal heat and UV radiation, which makes them safe for delicate pieces.
Color Temperature
Best Used For
Warm (2700K)
Traditional Art
Cool (4000K)
Contemporary Pieces
Optimal positioning for natural light
Small, high-mounted light sources bring out more half-tones[9]. Artwork needs protection from direct sunlight, especially during peak hours. UV-filtering films on windows and diffusing materials help us get the best results by softening natural light[8].
Creating dramatic shadows and highlights
Lights positioned at a 30-degree angle from the artwork create captivating displays[10]. This approach helps us:
Minimize harsh shadows and glare Boost texture and depth
Create balanced illumination across the piece
Smart light management can substantially change how colors appear. Warm purple shadows naturally emerge when painting with vermilion and black under the right lighting[9]. A mix of ambient and accent lighting adds depth and dimension to the gallery space[8].
Valuable pieces need protection from UV exposure. We use a layered lighting approach that combines natural and artificial sources to maintain steady illumination throughout the day[8]. This setup will give small wall art proper lighting while protecting it from damage.
High-End Hardware and Installation Methods
Our team has found that professional-grade hardware significantly impacts how small wall art looks in your space. Let us share what we know about installation methods that will help you create museum-worthy displays. Professional hanging systems
Quality gallery systems work best for small wall art. These systems need three main parts: picture rails, hanging cords, and adjustable hooks[11]. Each pair can hold up to 100 pounds[11], which works great for both light and heavy pieces.
System Type
Weight Capacity
Best For
Gallery Kit
Up to 100 lbs
Multiple frames
J-Channel
Up to 200 lbs
Heavy artwork
Traditional Rail
Up to 25 kg/meter
Classic spaces
Invisible mounting solutions
Invisible hanging systems give the most sophisticated look. These systems attach behind the artwork and make pieces look like they float on the wall[12]. The installation needs careful attention, but you'll love the results.
The best results come from:
Self-adhesive hooks made of galvanized steel
Aluminum back frames with power corners UV-protective mounting materials
Gallery-style spacing techniques
The right hardware combined with exact spacing turns small pieces into an impressive display. Years of gallery installations have taught us that 2-3 inches between frames creates perfect visual harmony[13].
Professional help often makes sense, especially with valuable pieces. Art installers charge around £79.42 per hour[14]. Their expertise will give you a secure and beautiful display.
Museum-standard installation starts with a full environmental assessment[15]. This careful approach means even the smallest pieces get gallery-quality treatment and proper security measures protect valuable artwork.
Luxury Finishing Touches
Small wall art displays become extraordinary with the right finishing touches. Our experience shows that attention to final details creates a luxurious presentation that lasts.
UV-protective glazing options
UV-protective glazing represents a vital investment for art preservation. These specialized materials filter up to 100% of UV light[16] and protect your artwork from fading and deterioration.
Protection Level
UV Blocking
Best For
Basic
70-92%
Decorative prints
Conservation
97%
Limited editions
Museum
99%
Original artwork
Quality UV protection serves as an insurance policy for your art collection[16]. The upfront cost might seem high, but the preservation benefits are worth the investment over time.
Conservation-grade backing materials
The right backing materials play a vital role in artwork longevity. We recommend these premium options:
Corrugated twinwall plastic with 4-ply matboard liner[17]
Conservation-grade white barrier paper[18]
Acid-free mount board with alkaline buffering[19]
Quality backing boards provide excellent humidity protection, especially with artwork framed behind glass or acrylic sheeting[17]. This combination creates the perfect environment that protects your pieces for years.
Designer-approved hardware finishes
Sophisticated hardware finishes complete a luxury presentation. Hand-finished hardware adds an elegant touch that elevates any wall art display. These designer-approved finishes work best for small wall art:
Burnished brass for traditional spaces[1]
Satin nickel plate for contemporary settings[1]
Hand-burnished nickel for a natural aged appearance[1]
Each finish undergoes careful hand-finishing in specialized factories[20]. Every piece receives individual attention, unlike mass-produced alternatives. This attention ensures consistent quality throughout all components.
Your smallest pieces can achieve museum-quality presentation with these finishing touches. UV protection, conservation-grade materials, and designer hardware work together to create impressive displays that preserve your artwork's beauty for generations to come. Creating Gallery-Worthy Wall Arrangements
A gallery wall's beauty lies in the perfect balance between art pieces and space. We know the techniques that turn simple arrangements into elegant displays. Our focus stays on methods that make the most visual impact in smaller areas.
Professional clustering techniques
Experience has taught us that good clustering needs a strong focal point. The space between frames must stay consistent - about 3 inches between pieces works best[21]. Here's what we recommend for small wall art arrangements:
Large pieces work best as anchors Smaller complementary works should build outward
Mini-collections fit well within the larger display
Art pieces should share a matching color palette to look more curated[22]. We suggest using similar tones or finishes to unite different frame styles. Balanced asymmetry principles
Visual weight plays a key role in asymmetrical balance. Our work shows that asymmetrical designs give a more sophisticated, lived-in look[23]. These strategies have proven effective:
Element
Purpose
Impact
Height variation
Creates visual interest
Draws eye movement
Size contrast
Establishes hierarchy
Adds dynamic tension
Frame mixing
Adds personality
Creates depth
Each area should complement others without overpowering them [24]. This creates a harmonious display where every piece adds to the whole composition. Negative space utilization
Negative space lets artwork breathe naturally. The right use of white space can boost the impact of small wall art significantly[25]. Strategic use of negative space helps:
1. Content flows better
2. Visual hierarchy becomes clear
3. Visual clutter reduces
4. Overall sophistication improves
We focus on "micro" and "macro" space - small gaps between pieces and larger areas around the entire arrangement[26]. This approach gives each piece proper attention without overwhelming viewers.
Small spaces work best with 60% of the wall area filled with art. The other 40% should stay as intentional negative space[7]. This ratio creates a balanced composition that looks sophisticated and purposeful.
Success in gallery arrangements comes from careful attention to both positive and negative space[24]. These professional techniques help modest-sized art pieces make a strong visual statement in compact areas. Conclusion
Small wall art deserves as much attention as larger pieces. Professional framing, smart lighting, and proper installation methods help small artwork make a powerful visual effect in any space.
Success comes from paying attention to details. UV-protective glazing and precise spacing between pieces matter a lot. These small elements work together to turn basic displays into sophisticated gallery-worthy arrangements.
You don't need a massive budget to make small wall art look expensive. You just need to think over your framing materials, lighting angles, and arrangement principles carefully. These designer secrets will help you create displays that pack a punch while you retain professional standards of preservation and presentation.
References
[1] - https://www.armacmartin.co.uk/collections/finishes?srsltid=AfmBOoqVs3UsgkwrwjqLxaHa1GP1LrbPzdyzVxfIUHumm1CtFlMFh3Dp [2] - https://canvas.saatchiart.com/art/art-news/a-guide-to-custom-framing-art
[3] - https://www.siobhanduggan.ie/blog/192421/knowing-how-to-frame-small-artwork-is-an-art-form-in-itself
[4] - https://www.myartbroker.com/collecting/articles/guide-to-framing-prints-editions
[5] - https://www.digitalab.co.uk/framing-premium-molding/
[6] - https://www.theprintspace.co.uk/online-photo-art-framing/
[7] - https://www.abbeyfealeinteriors.com/blog/the-magic-formula-for-good-design-symmetry-and-balance
[8] - https://www.alconlighting.com/blog/lighting-design/lighting-for-art/?srsltid=AfmBOorLtb1MHdUqMnxTKxmG0HI_d03S5TI1kNVM14LzyZ3plTAz92T9 [9] - https://www.marcdalessio.com/studio-lighting-part-i-natural-light/
[10] - https://www.architectmagazine.com/technology/lighting/art-lighting-101-techniques-for-artwork-in-any-form_o
[11] - https://www.picturehangsolutions.com/blogs/info/5-best-hanging-hardware-to-create-an-art-gallery-inspired-wall?
srsltid=AfmBOooeGrJUZNywFsw8J4lpqxGKb147V-H0wKIj_AvMQzhftMq7qRUb
[12] - https://www.artiteq.com/en/residential/invisible-hanging-system/
[13] - https://southernyankeediy.com/projects/diy-decor/gallery-wall-rules-to-follow-break-plus-cheat-sheet/
[14] - https://thepracticalartworld.com/2011/02/08/choosing-hardware-to-hang-artwork/
[15] - https://www.crownfineart.com/services/installation
[16] - https://artglass.groglass.com/uv-protective/
[17] - https://www.canada.ca/en/conservation-institute/services/conservation-preservation-publications/canadian-conservation-institute-notes/backing-boards paintings.html
[18] - https://www.wessexpictures.com/ART-BAK_CONSERVATION_BOARD.html
[19] - http://blog.ukpictureframingsupplies.co.uk/picture-mounting/conservation-mounting-protection-artwork/
[20] - https://www.armacmartin.co.uk/products/finish-chips?srsltid=AfmBOopQRcrHn4PK6cVzG0jnmgn737jI1UEUIWMZv1fxPr5HHsG18Ir4 [21] - https://stylebyemilyhenderson.com/blog/how-to-make-a-gallery-wall
[22] - https://thedecorologist.com/how-to-create-wall-art-groupings/
[23] - https://havenly.com/blog/asymmetrical-balance-interior-design
[24] - https://www.smashingmagazine.com/2015/06/design-principles-compositional-balance-symmetry-asymmetry/
[25] -https://www.moo.com/blog/uk/inspiration/negative-space-positive-impact?srsltid=AfmBOoqpXBLpYlre7NzYDdbpj-41VekRoD-mbdihdBL45D12A_K8h0t_ [26] -https://design4users.com/negative-space-in-design/